|.♥.| Dreambox Tutorials With Pictures by sunsong |.♥.|
|.♥.| Dreambox Tutorials With Pictures by sunsong |.♥.|
Here you find some Tutorials for DREAMBOX DIGITAL RECEIVER
^^ How to flash your Dreambox DM500 HD with DreamUp ^^
First disconnect the box from main power
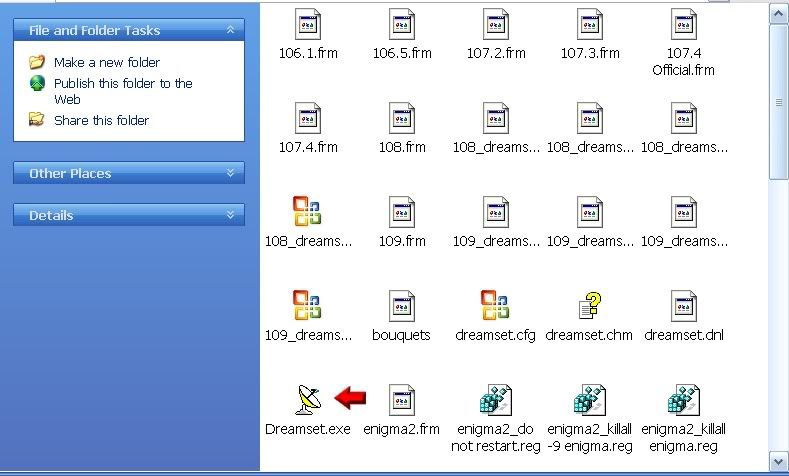
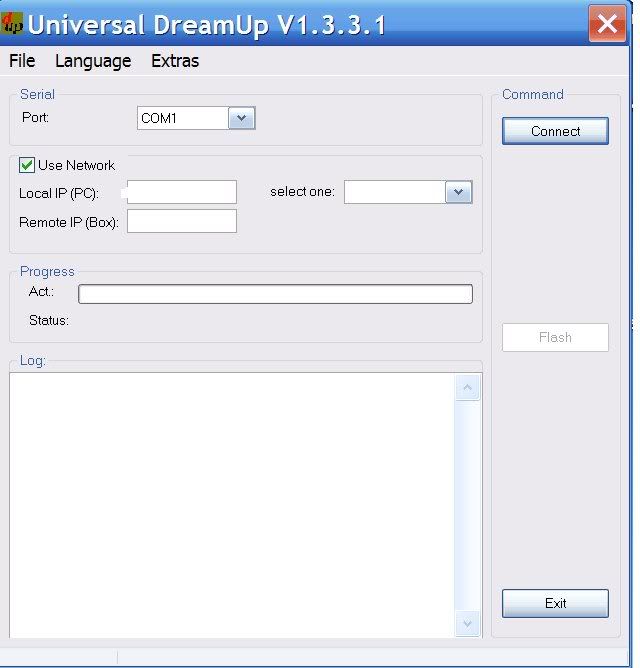
Start the program DreamUp
Attach box with rs232 Cable
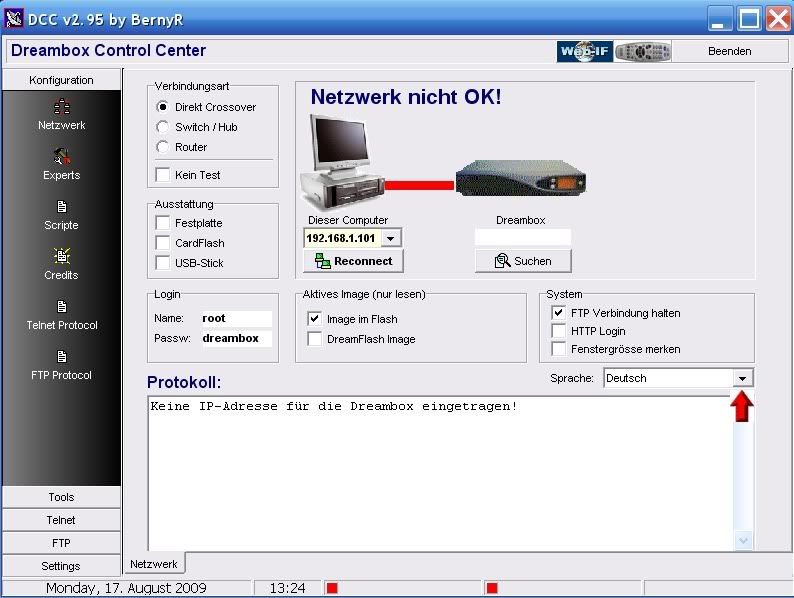
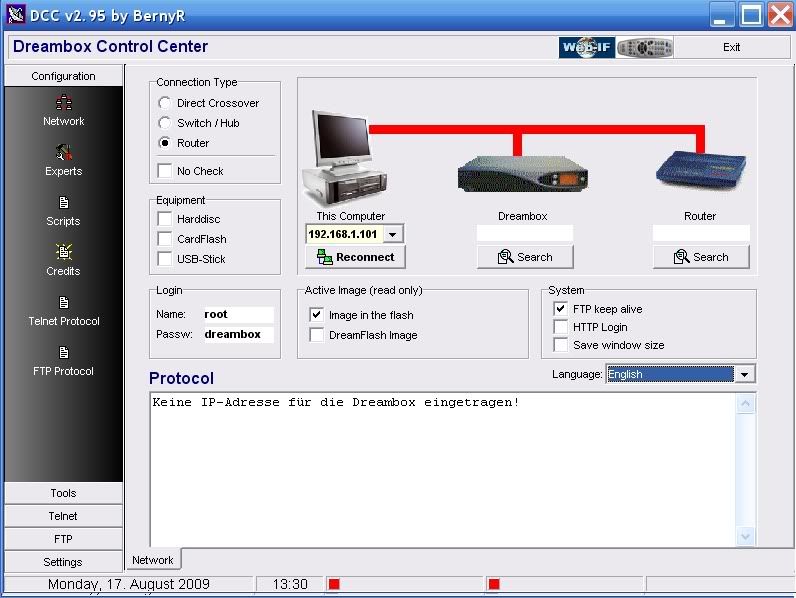
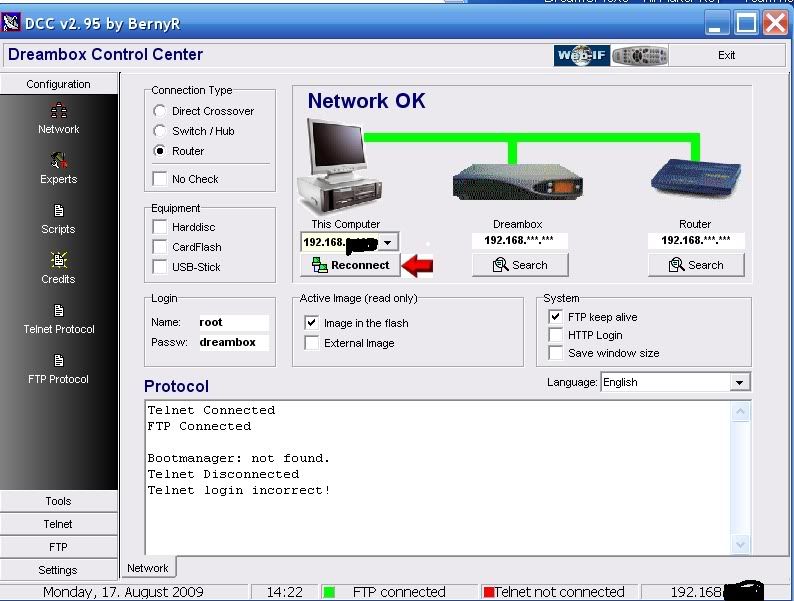
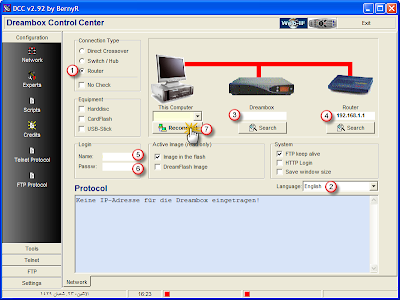
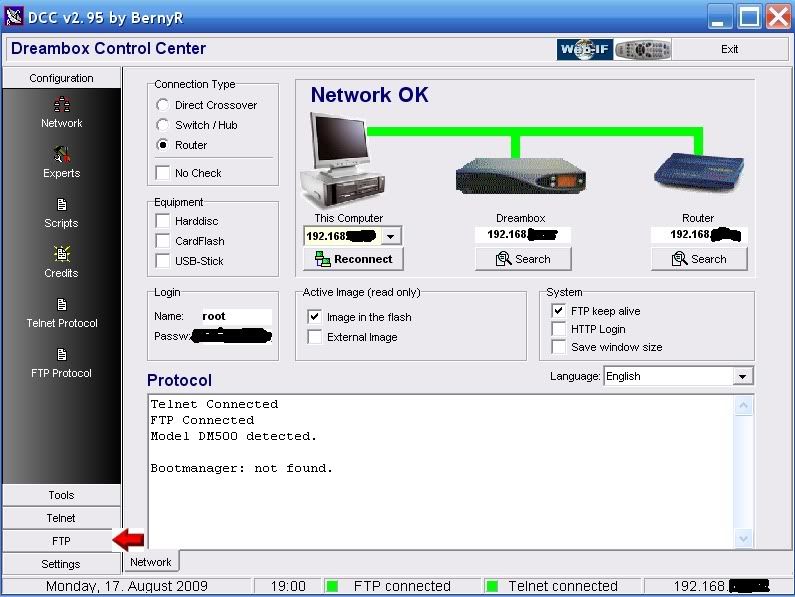
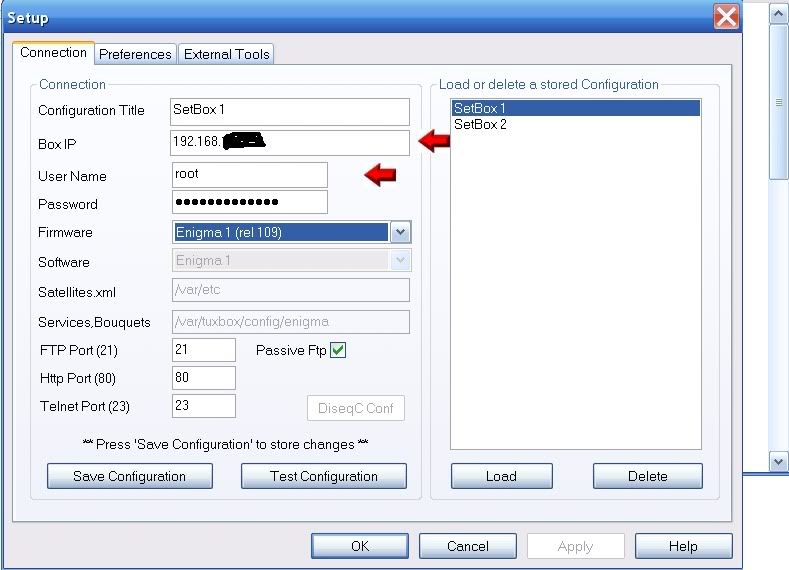
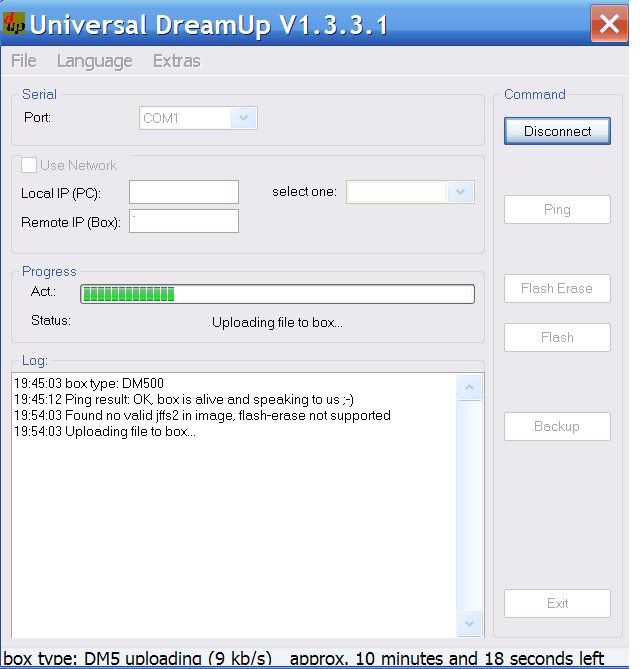
Select your Com Port or use network
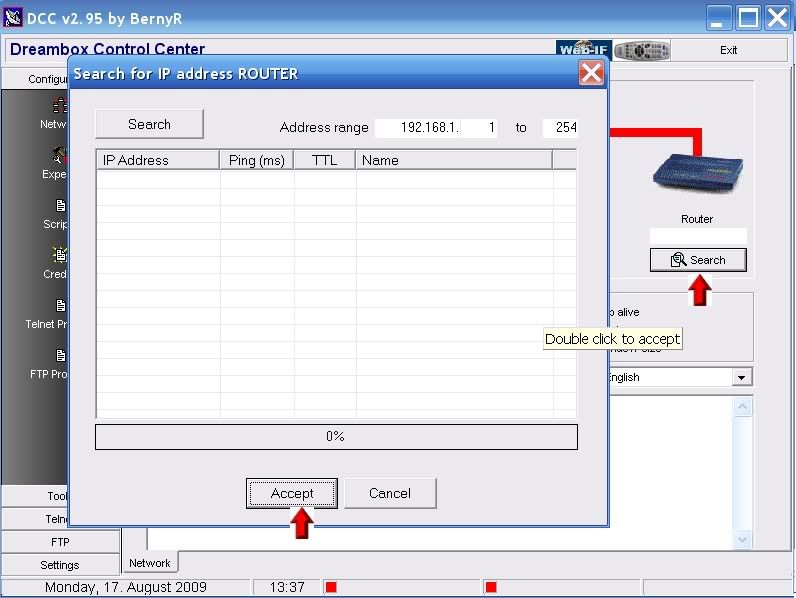
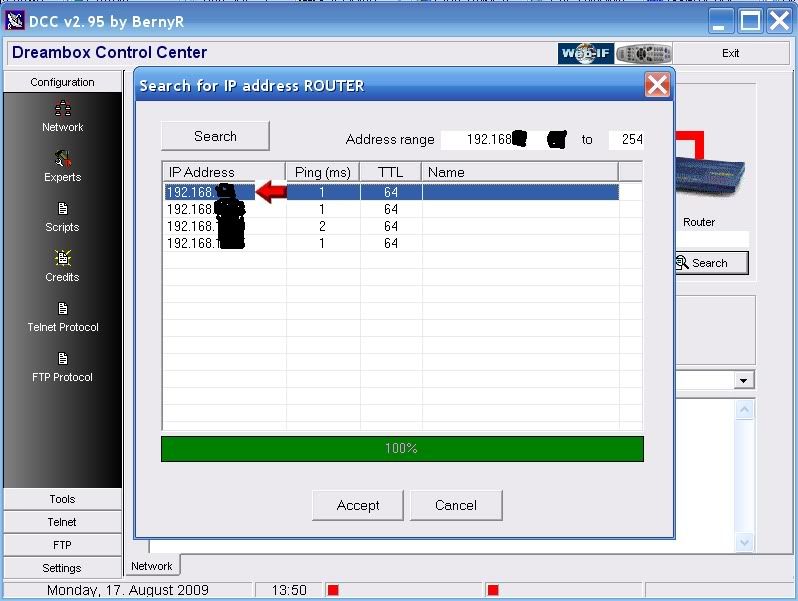
If network: Enter the local IP from your PC, enter a remote IP for your Box
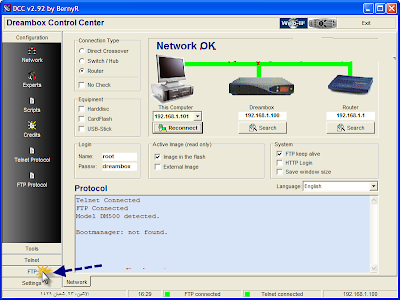
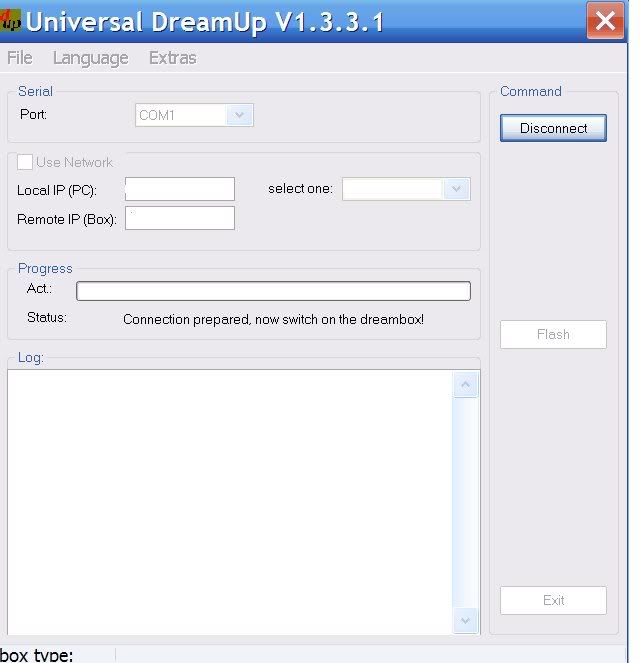
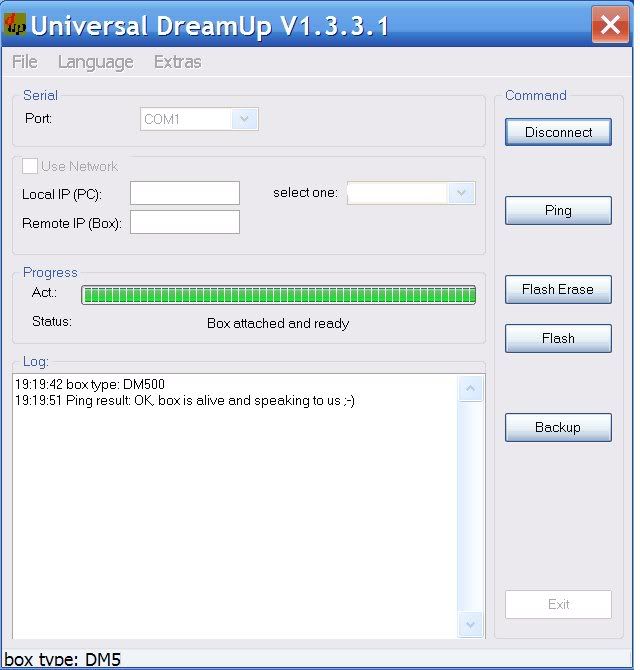
Press the "Connect" button and then connect the box to main power
Wait a moment
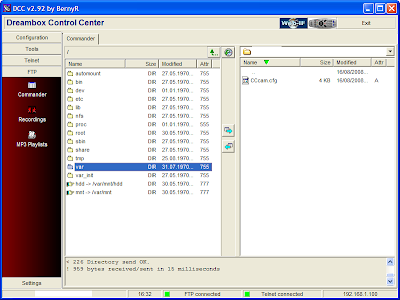
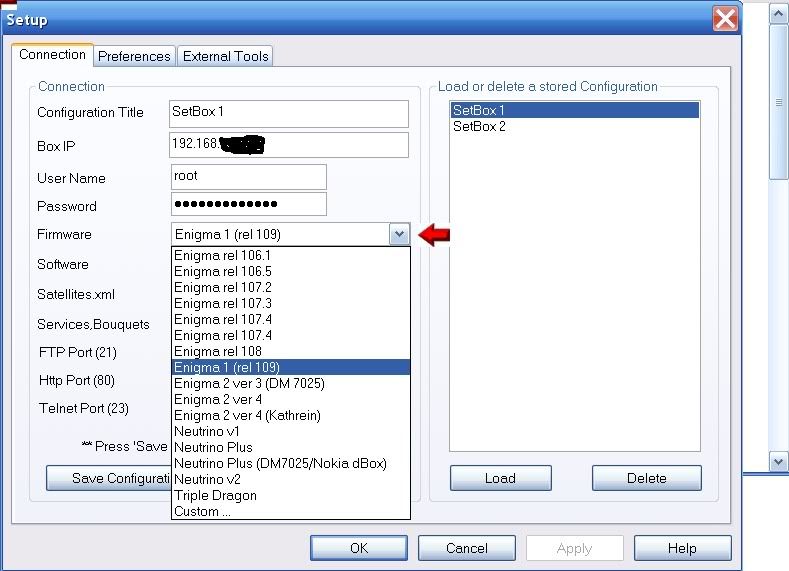
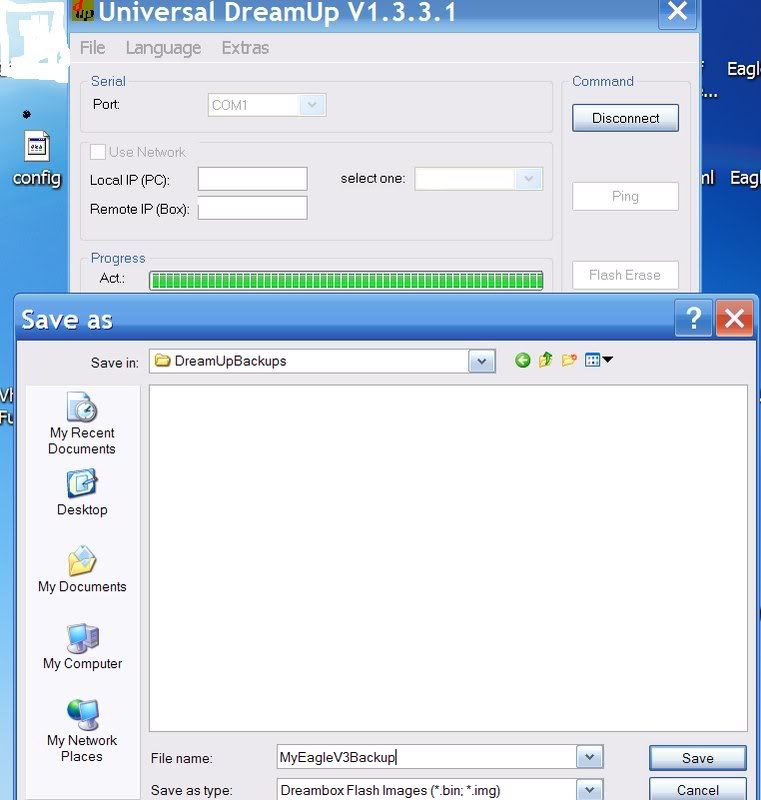
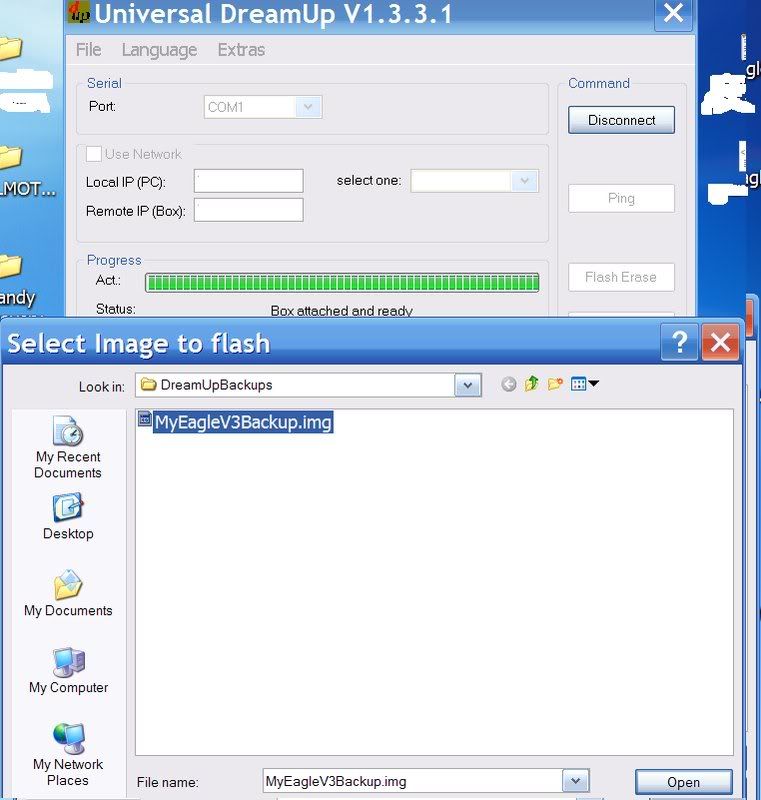
After the flash loader is transferred into the Box select the firmware by pressing
the "Flash" button then select the firmware and click "open"
Upload starts now, please wait
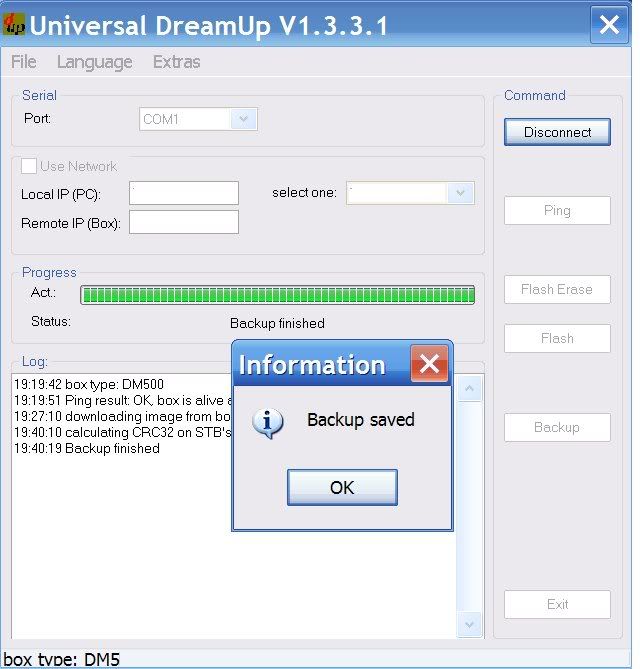
Box is flashing the new firmware into the flash memory, please wait
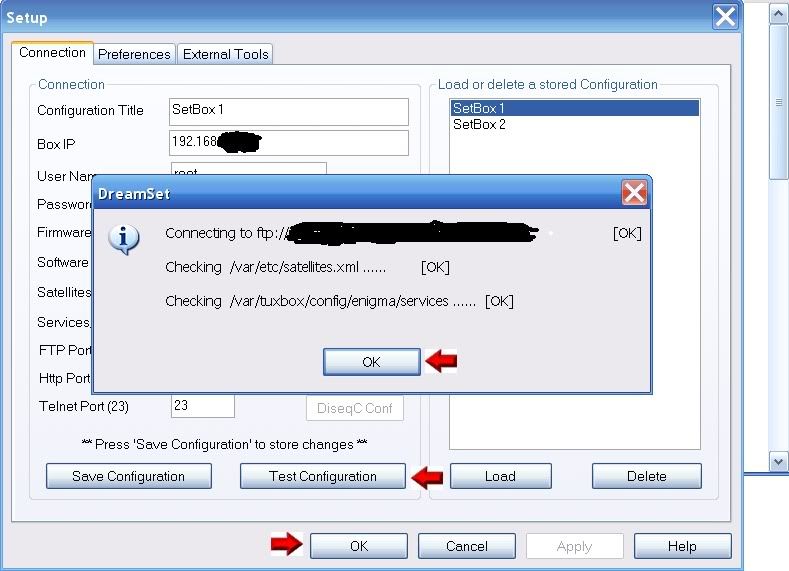
Flashing done, press "OK"
Press "disconnect then exit"
Restart the box
DreamUP 1.3.3.9 [Last] by sunsong
Re: |.♥.| Dreambox Tutorials With Pictures by sunsong |.♥
^^ HOW TO CONNECT DREAMBOX WITH PC ^^
First download DCC (Dreambox Control Center Setup)
After downloading Unrar DCC to a folder and start the program with the DCC.exe
First thing to do is select your Language and enter your Dreambox password.
Now we need to select your Network configuration, most of you will have a router so this needs to be selected
At this point if you know your Dreambox and Router IP's enter them manually if not press the search button below the router and then the search button on the popup.
When DCC has finished searching your router will normally be the lowest ip in a range so highlight it and press accept.
You can now repeat this to find the Dreambox IP or use the following method.
Menu-Setup-Expert Setup-Communication Setup.
You'll see your IP at the top of the page make a note of this and enter this IP in DCC under the Dreambox ICON.
Also untick the DHCP box so your Dreambox IP will never change and remain static.
After you have inserted the IP's click the reconnect button under the PC icon. If you have done this correctly all lines to the router and dreambox should now be green.
DCC 2.96 [Last] by sunsong
Re: |.♥.| Dreambox Tutorials With Pictures by sunsong |.♥
^^ How to Send CCcam Server to DreamBox ^^
1 - Select an option as shown in the picture
2 - Select English
3 - Put IP Dreambox
4 - Put Page modem
5 - Enter user's name root
6 - Enter password dreambox
7 - then Click here to start the connection with dreambox
If the color appears green, it means that he has been successfully connect todreambox and if the red color appears be sure to enter a good data
Then click FTP.
OPEN var FILE
OPEN etc FILE
Locate subscription file, and then Select it and send it As is clear in the image
will show you the message click on yes to approve the replacement
as well the file be sent up successfully for Dreambox
For other contributions:
If you have a file subscription Newcamd: you send file to the track
var / tuxbox / config / newcamd
If it subscription file it mgcamd Send to
var / keys
If you have a subscription CCcam sent to
var / etc
Re: |.♥.| Dreambox Tutorials With Pictures by sunsong |.♥
^^ Manually Transfer Keys To Your Dreambox ^^
Extract the keys of your choices to a folder
Start DCC and click on the FTP tab
In the Left hand window of DCC you will see the folders on your Dreambox and in the right hand window the folders on your PC
In the right hand window off DCC navigate to where you extracted your Dreambox keys go in one level so you can see the keys and scce folders and in the left hand window navigate to var/keys.
In the right hand window enter the keys folder and select them all. Now press the Transfer arrow to transfer the files over to var/keys in the right hand window
Now go up a level in both window so you have var/scce in the left hand window and enter the scce folder in the right hand window. Now press the Transfer arrow to transfer the files over to var/scce in the right hand window
Now reboot your Dreambox Menu-shutdown-reboot now
Re: |.♥.| Dreambox Tutorials With Pictures by sunsong |.♥
^^ Transfer A Channel List To Your DreamBox ^^
First download Dreamset
Unrar Dreamset and place all the files into a folder.
Start the program with the little dish icon.
Click setup.
Click the setup Tab at the top and fill in your IP and passwords.
On the Firmware Tab for Enigma1 (500-7020) select Enigma 1 (rel109) for Enigma 2 (DM7025) and (800-800) use Enigma 2 version 3 or 4. Ensure passive FTP is ticked.
Now click the save configuration tab and then the test configuration tab to check we have a connection to the Dreambox. If successful press OK and then OK again.
Now click open and scroll to the settings and select the services for E1 and lamdb file for E2 and open.
Now click the transfer button and then write and wait for it to finish.
Dreamset 2.39 [Last] x86
Dreamset 2.39 [Last] x64
Re: |.♥.| Dreambox Tutorials With Pictures by sunsong |.♥
^^ Dreambox Image Backup ^^
The purpose of this guide is to provide a backup which is made with the purpose of restoring your Dreambox back to a state preferred by you. This guide uses a null modem cable and the backup created will be flashable only with DreamUp via a null cable.
This type of backup is ideal for situation when you have lost network communications to your Dreambox through a corrupt image.
Ensure your Dreambox is switched off before making cable connection and leave it powered of till later.
Start DreamUp and ensure the use network box is unticked.
In the port box ensure the correct com port is selected.
Click on the connect button and wait for the Connection prepared now switch on your Dreambox prompt.
Switch on your Dreambox.
Now click the backup button and enter a name for your Dreambox Backup in the file name box ending the file name with .img then click save.
Your backup will now start and will take around 12 minutes.
Re: |.♥.| Dreambox Tutorials With Pictures by sunsong |.♥
^^ Dreambox Image Restore ^^
Start DreamUp and ensure the use network box is unticked.
Click on the connect button and wait for the Connection prepared now switch on your Dreambox prompt.
Switch on your Dreambox.
Now click the Flash button and select your Dreambox Backup and click open.
Your restore will now start and will take around 12 minutes.
Re: |.♥.| Dreambox Tutorials With Pictures by sunsong |.♥
^^ Change Your Dreambox Password With DCC ^^
1. Click on telnet then you get a black screen
2. Type on the screen login
root, dreambox if default then type password
3. It will give you the option to type a new password be careful because you do not see any letters come on the screen. Type the password then hit return and retype it again, then you will see password changed.
If you see the bad password: too weak, ignore it and retype the same as you did first.
Here are pictures:
-
- Registered Member
- Posts: 196
- Joined: 19 Jun 2013, 4:55 pm
- Location: ♥♥DERA BUGTI♥♥
- Been thanked: 4 times
- kami2k
- Gold Contributor
- Posts: 1287
- Joined: 16 Jun 2013, 7:42 pm
- Location: Muzaffarabad - Azad Kashmir
- Has thanked: 42 times
- Been thanked: 9 times
Re: |.♥.| Dreambox Tutorials With Pictures by sunsong |.♥
any way to save and restore disque setting after flashing new image?
.....(¯`v´¯)
..... ·.¸.·´
...¸.·´
.. (
☻/
/▌
/ \ Spread LOVE and PEACE . Press "Thanks" ♥
Intel 8700K |CM |GIGABYTE Z370|G.SKILL Ripjaws 16GB |SSD 256GB,8TB|Gigabyte GTX 1050 2GB|CM 750W|46" Samsung|VU+ SOLO2:UNO
..... ·.¸.·´
...¸.·´
.. (
☻/
/▌
/ \ Spread LOVE and PEACE . Press "Thanks" ♥
Who is online
Users browsing this forum: Amazon [Bot], Bing, Claude, Google and 1 guest